Super Mario War 1.7 April Fools Edition - ReadMe
2004-2007 (c) Florian Hufsky, Two52, and many others.
Last ReadMe update: 26 March 2007
Official Super Mario War Website
Official Super Mario War Forums
Official Fan-Made Content Website
Hey!
This is the (outdated) version of the manual from our last major release. I'm still working on the manual for this release - you can see the current draft in the readme_new.txt file that came with this version.
April Fools Edition
The April Fools Edition of Super Mario War is based on the 1.7 release. It contains a handful of bug fixes, but more importantly, it is full of secret features. There are more than 20 features hidden within ranging from special moves for players and powerups to new items to well, you'll just have to find out.
There is a contest at http://forum.72dpiarmy.com to see who can unlock the most hidden features. The contest winner will be awarded special forum status and a badge on the splash screen for next release of SMW! So keep checking the forums for the latest codes and unlocked features forum members have found!
A quick note
If you have problems opening the Readme Sections in IE, you should disable the automatic disabling of Javascript. (If you're having problems, a security notice probably popped up somewhere in your window.) Even better, try an alternate browser!
Super Mario War was developed by Florian Hufsky, Two52 and many more contributors. For a complete list of all these wonderful people, please see the file THANKS.txt which was included in this distribution. A list of changes to the game can also be found in WHATSNEW.txt, which should be in the same place.
If you create a map or some other content that you would like to share, or if you would like to share your comments in general, please visit the Super Mario War website and post a message in our forums. New content is posted all the time, and your feedback and user-content is always welcome and appreciated, so please come visit!
Also, we have an official outlet for fan-made content like maps, music packs, skins, announcers, etc. Head on over to the Super Mario War Stuff website. It's full of the latest content released by fans of the game. Don't like how the menu looks? Try downloading a new menu pack! Tired of playing the same maps over and over? There are hundreds more available! More skins? We've got tons! Need somewhere to post content of your own? That's what it's there for! Take a moment and check it out!
Oh, and one other little note: for the most part, this manual was written for use with the PC version of Super Mario War. Some things are different on the Xbox version. If there is anything important that we missed documenting that specifically applies to the Xbox version, please let us know on the forums and we'll add it to this manual. Of course, if there's anything pertaining to both versions that we've missed, you should let us know about that, too!
Getting Started [click to view]
Super Mario War is a game for up to four players with many different modes of play. The basic goal of the game is to be the last player standing, and to accomplish this goal you must jump on your opponents' heads to kill them. There are many Mario-themed items you can use to help you kill your opponents, as well. In addition, there are several variations on this basic gameplay mechanic which you can try, such as Chicken, Capture The Flag, and so on. Plus, for those who enjoy customization, there are several aspects of the game which you can tweak to your liking through the Options menus, and if you like, you can make your own maps, skins, and other custom content to use (or download others' to use), too!
This section of the manual explains how to navigate the game's menus, and contains a short explanation of Tournaments and Tours as well. Please note that all of the controls listed in this section are defaults, and can be reconfigured if you like.
The Main Menu
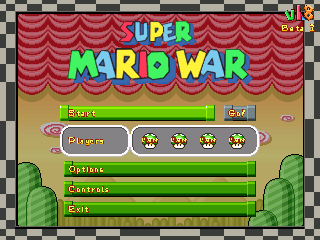
From this menu, you can access everything else in the game.
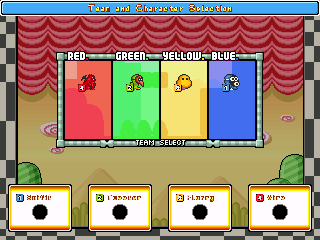
Team and Character Selection
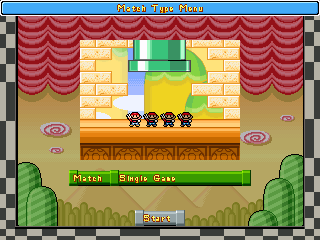
From this screen, you can configure who is using which character and is on which team.
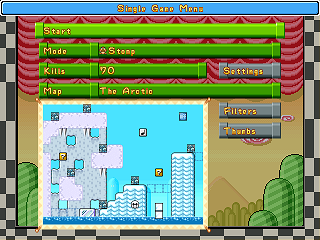
Game Selection
From this menu, you can select your game mode, select the map you wish to use, change various mode settings, and tag your maps for easy selection. (When playing a Tour, all options on this screen, besides Start, are disabled.)
Playing the Game
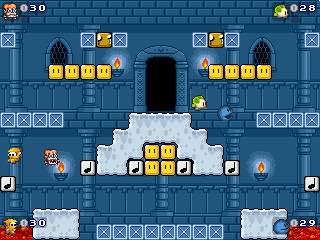
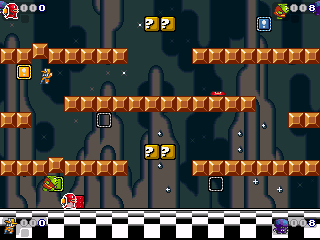
The main goal of the game is to stomp on your opponents' heads to kill them, although depending on the map you're playing on, you may be able to kill them in other ways, such as with items. There may also be additional rules or a different way of winning, depending on the mode you are playing; for information on these, you can check the Game Modes section of this manual. For information on the controls you'll be using to play the game, check out the section on Controls, below. And to learn about the different items and map elements you can use to turn the tables on your opponents, take a look at the Items and Special Blocks sections, towards the middle of the manual.
Tournaments and Tours
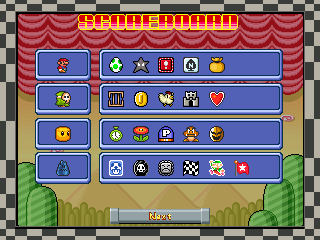
In a Tournament, players play games until one player has amassed a certain number of wins. The number of the Tournament determines how many wins are required (so, if you pick Tournament 4, you have to win four times). Each time a player wins, they will receive an icon on the scoreboard (first picture, above). This icon will be representative of the mode played.
In a Tour, players play a series of predetermined games ("tour stops"). At the end of each game, players receive points based on how well they placed, and icons will be displayed on the scoreboard (second picture, above) to show just how each player placed in that round. Tours can be created by making a text file in the game's Tours subdirectory, following the correct format (check out simple.txt for more info). It is possible to designate how valuable each individual tour stop is (this information is displayed along the top of the scoreboard - see the screenshot), as well as which tour stops grant a bonus item to the winner.
At the end of a Tournament, or after every game within the Tournament if that option is set (see the Options section towards the end of this manual), the winner will get a chance to spin the bonus wheel to acquire an item that they can use in the next game or games. However, in Tours, the bonus wheel will only appear in places where the tour's creator designates it, regardless of any current settings. Tour stops with this opportunity are represented on the scoreboard as small winged yellow boxes.
Controls [click to view]
PC - Keyboard [click to view]
The following are the default controls. Controls can be configured within the Controls menu, accessible from the main menu. From there, you can also switch your input devices to joysticks (see the next section for information on joystick controls).
Game controls
| Player 1 | Player 2 | Player 3 | Player 4 | |
| Left | Left Arrow | A | G | L |
| Right | Right Arrow | D | J | ' |
| Jump | Up Arrow | W | Y | P |
| Down | Down Arrow | S | H | ; |
| Turbo | R. Ctrl | E | U | [ |
| Use Item | R. Shift | Q | T | O |
| Pause | Enter | n/a | n/a | n/a |
| Exit | Esc | n/a | n/a | n/a |
Menu controls
| Player 1 | Player 2 | Player 3 | Player 4 | |
| Up | Up Arrow | W | Y | P |
| Down | Down Arrow | S | H | : |
| Left | Left Arrow | A | G | L |
| Right | Right Arrow | D | J | ' |
| Select | Enter | E | U | [ |
| Cancel | Escape | Q | T | O |
| Random | Space Bar | n/a | n/a | n/a |
| Fast Scroll | L. Shift | n/a | n/a | n/a |
PC - Joystick [click to view]
When using joysticks, it is important to note that there are a couple of differences in some basic controls. It is also important to note that the default settings for inputs are, most likely, not the ones you want, since every joystick internally numbers and names its buttons differently (for example, on Joystick A, "button 1" might be the A button, whereas on Joystick B it's the left trigger). So when you set the game up to use a joystick, be sure to configure the buttons to something you like. (For this reason, the default controls will not be listed here.)
The following are the changes to the controls when using a joystick. For information on controls not listed here, see the Keyboard section.
Xbox [click to view]
When playing on the Xbox, each player is "locked in" to their joystick - in other words, Player 1 will always use the joystick plugged into the first port, etc.
The following are the default controls. All controls can be reconfigured via the Controls menu, accessible from the main menu.
Game controls
| All Players | |
| Left | Left (D-Pad) |
| Right | Right (D-Pad) |
| Jump | A |
| Down | Down (D-Pad) |
| Turbo | X |
| Use Item | Y |
| Pause | Start |
| Exit | Back |
Menu controls
| All Players | |
| Up | Up (D-Pad) |
| Down | Down (D-Pad) |
| Left | Left (D-Pad) |
| Right | Right (D-Pad) |
| Select | A |
| Cancel | Back |
| Random | X |
| Fast Scroll | Y |
Game Modes [click to view]
There are many different ways to play Super Mario War. Each one is a little different than all the others, and each one requires different strategies. In addition, some modes have additional options that you can use to customize your game further. In the listings of possible options below, the defaults are shown in bold.
An option common to all modes (and subsequently not listed under each one) is the ability to set the basic parameter to "Unlimited", or Free Play.
 Classic
This is the original Mario War game where each player starts with X lives and the last player with any lives left is the winner. Touching a hazard (such as spikes) causes you to lose a life; collecting a 1UP mushroom gives you an extra life.
Basic Parameter: Lives (5 to 100 by 5s, 10 default)
Additional Parameters: None
 Frag Limit
This is the standard frag limit game where the first player to kill X players wins. Dying on a hazard causes you to lose a frag; collecting a 1UP mushroom gives you an extra frag.
Basic Parameter: Kills (5 to 100 by 5s, 20 default)
Additional Parameters: None
 Time Limit
This is a timed game played to the number of seconds you select. The player with the most frags at the end of this time is the winner. Dying on a hazard causes you to lose a frag; collecting a 1UP mushroom gives you an extra frag.
Basic Parameter: Time (30 to 600 by 30s, 60 default)
Additional Parameters: None
 Jail
Jail
This mode is similar to Frag Limit, but with a couple of modifications. Each player you kill in this mode will spawn in jail. When a player is in jail, their movement is slowed down and their jumping ability is hampered. If all the players on other teams are jailed, you earn extra points and everyone (both on your team and other teams) is freed. (This bonus is disabled in a 1v1 match, however, due to complete pointlessness.) If a player on your team tags you while in jail, you are freed. You are also freed if you spend enough time in jail.
Basic Parameter: Kills (5 to 100 by 5s, 20 default)
Additional Parameters:
 Coin Collection
This game isn't about killing other players, it is about collecting coins. One or more coins will appear somewhere on the map. If someone grabs a coin, or if nobody can get to one within a certain amount of time, a new one will appear somewhere else. The first player to collect X coins wins. Whether dying has an effect can be set in this mode's optins, and collecting a 1UP counts as collecting a coin.
Basic Parameter: Coins (5 to 100 by 5s, 20 default)
Additional Parameters:
 Stomp
Stomp
In this mode, Goombas, Cheep Cheeps, and Koopas will randomly spawn; the goal is to stomp or shoot as many as you can. The first player to kill X enemies wins. Stomping other players does nothing; neither does getting killed on hazards. Collecting a 1UP counts as an extra kill.
Basic Parameter: Kills (10 to 200 by 10s, 10 default)
Additional Parameters:
 Yoshi's Eggs
In this mode, a Yoshi and a bouncy little green-spotted egg will randomly spawn. Players can pick the egg up by holding the Turbo button and bring it back to Yoshi to gain a point. The first person to return X eggs to Yoshi wins the game. If you die, of course, you will lose the egg; collecting a 1UP gives you an additional point. If the egg is not grabbed for a long enough period of time, it will move to another random location.
Basic Parameter: Eggs (5 to 100 by 5s, 20 default)
Additional Parameters: None
 Capture The Flag
In this mode, each team has a base and a flag. The goal is to protect your flag from being stolen and at the same time steal other teams' flags and bring them back to your base. The first team to return X enemy flags to their base wins. You can also bring your own flags back to your base if you can retrieve them from an opponent. Collecting a 1UP counts as having collected an enemy flag; dying in any way has no effect on your score.
Basic Parameter: Flags (5 to 100 by 5s, 20 default)
Additional Parameters:
 Chicken
In this mode, the first person to kill another person will turn into the chicken. The player that is the chicken will constantly rack up points. The first player to X points wins. Dying on spikes will cause you to stop being the chicken, if you are; collecting a 1UP mushroom will give you 10 points no matter who you are. Killing another player while you're the chicken will also give you a bonus of 5 points.
Basic Parameter: Points (50 to 1000 by 50s, 200 default)
Additional Parameters:
 Tag
Tag
Tag is essentially the opposite of Chicken mode. At the start, one player will randomly be chosen as the tagged player (they will turn bright green with a white border). It is the job of the tagged one to kill (or touch) somebody else to transfer the tag. The tagged player gets a speed boost to help him catch the other players. When you're the tagged player, you'll constantly be losing points. When you hit 0, you are removed from the game and the player with the highest points will then become tagged. Being killed or killing yourself takes 5 points off your score and collecting a 1UP mushroom restores 10 points.
Basic Parameter: Points (50 to 1000 by 50s, 200 default)
Additional Parameters:
 Star
Star
In this mode, there will either be a Ztar or a Shine, depending on how the options are set. One player will be designated to be the owner of this object, and if other players touch it, they will steal the object's ownership status. There is also a timer that gradually counts down.
Basic Parameter: Lives (1 to 20, 5 default)
Additional Parameters:
 Domination
This mode is like the domination mode from many FPSs. There will be several bases randomly placed around the map and it is the goal to control as many of them as possible. You control them by tagging them. The more you control, the faster you accumulate points; the first player to accumulate X points wins. Additionally, every so often the bases will automatically relocate themselves to new, random positions. Collecting a 1UP gives you 10 points; what happens when you die (by any means) can be set in this mode's options.
Basic Parameter: Points (50 to 1000 by 50s, 200 default)
Additional Parameters:
 King Of The Hill
In this mode there is a small zone, "the hill," designated by a chainlink fence design. While your team is the only one with players in this zone, you have control of the hill; its border will change to your team's color and your team will gain points at a constant rate. However, the hill will occasionally relocate itself to a new, random position. First team to X points wins. Collecting a 1UP grants 10 points; dying does not affect your score.
Basic Parameter: Points (50 to 1000 by 50s, 200 default)
Additional Parameters:
 Race
Race
In this mode, you must race around the map tagging moving targets in numerical order (you must tag "1" first, then "2", and so on). As you tag targets, your team indicator will appear on them. Once you tag all the numbered targets, head to the finish line (the checkered flag) to score a point. Collecting a 1UP gives you one extra lap; the penalty for dying can be configured in this mode's options. (It should be noted that in Race mode, 2UPs and 3UPs are only worth 1 extra lap, and 5UPs are worth only two, due to the usual small size of the goal score.)
Basic Parameter: Laps (5 to 100 by 5s, 10 default)
Additional Parameters:
 Owned
Owned
This mode is similar to Domination, except the players are your targets. Each player that you kill will spawn with a circle of your color behind them. For every player you have "Owned", the faster you accumulate points. If you are killed, you lose all your owned players. Collecting a 1UP gives you 10 points. Also, if you kill one of the players you already own, you will receive an extra 5 points.
Basic Parameter: Points (50 to 1000 by 50s, 200 default)
Additional Parameters: None
 Frenzy
This mode has the same rules as Frag Limit, except special powerup cards will randomly spawn around the map. Collecting one of these cards has the same effect as getting that item out of an item box, for the most part. This just makes the basic deathmatch just a little more exciting, not to mention that it lets you have items on maps that usually don't. There are twelve items that can appear on the cards: Bob-Ombs, Fire Flowers, Hammers, Feathers, Boomerangs, POWs, MOds, Bullet Bills, and all four different types of Shells.
Basic Parameter: Kills (5 to 100 by 5s, 20 default)
Additional Parameters:
 Survival
This mode has the same rules as Classic, except now, Thwomps will rain down from the sky, Podoboos will pop up from the bottom, and fireballs will shoot in from the sides. Hitting any of these hazards will kill you. Just as in Classic, the last player alive wins.
Basic Parameter: Lives (5 to 100 by 5s, 20 default)
Additional Parameters:
Special Blocks [click to view]
 Bricks
If you hit these from underneath, or from the side with a shell, they will break. If anything is standing on these when you break them from below, you will kill it.
 Note Blocks
These make you bounce. If you time your jump off them, you can go really high!
 Item Boxes
If you hit one of these from underneath, or from the side with a shell, a random item will pop out of it. You can also kill things on top of these by bumping them.
 Flip Blocks
If you hit these from underneath, they will start spinning. While they are spinning, you can go through them as if they weren't there. If they aren't spinning, and you hit these with shells, they will break.
 Bounce Blocks
If something is standing on one of these, and you hit it from underneath, you will kill what was standing there. Don't stand on these too much if you can avoid it!
 Donut Blocks
If you stand on these too long they will fall off the map. Watch out for traps underneath!
 Blue Throw Blocks
You can pick these up and throw them at other players with the Turbo button. They will break when they hit a wall or another player. They will also disappear by themselves if you hold them for too long.
 ON/OFF Switches
These come in four colors. While they are ON, all corresponding Switch Blocks on the map will be solid; similarly, while they are OFF, their Switch Blocks will be transparent. When you hit one of these from underneath or with a shell from the side, they will switch states. You can also kill people standing on Switches by bumping them from underneath.
 Switch Blocks
Like the Switches, these come in four colors. When you can see their outlines, you can travel right through them; while they are completely visible, they act as a regular solid tile.
Items [click to view]
Items in the game can be acquired in two ways: from item boxes ("?" blocks) or from Bonus Wheel spins. When collecting an item from an item box, it may be used instantly or it may be stored for later use, depending on the item. Items that are acquired by spinning the Bonus Wheel will always become a stored item at the beginning of each game you play, until they are overridden by another wheel spin or are cleared via the options menu.
Here are the classes of items:
 1UP Mushroom
Type: Instant
In game modes where the score is a measure of lives, frags, Goomba kills, etc., this item will grant you an extra life, frag, lap, etc. In all other modes, this item will grant you 10 extra points.
 2UP Mushroom
Type: Instant
Catching this pretty pink 'shroom counts as having collected 2 1UP Mushrooms (so you will receive either 2 extra lives, frags, etc., or 20 points towards the goal, with the exception of Race and Star modes in which this item still grants only 1 extra point). However, it moves a little faster than a 1UP.
 3UP Mushroom
Type: Instant
Grabbing a blue mushie counts as having collected 3 1UP Mushrooms (so you will receive either 3 extra lives, frags, etc., or 30 points towards the goal, with the exception of Race and Star modes in which this item still grants only 1 extra point). However, it moves quite a bit faster than a 1UP.
 5UP Mushroom
Type: Instant
Snagging this golden treat counts as having collected 5 1UP Mushrooms (so you will receive either 5 extra lives, frags, etc., or a whopping 50 points towards the goal, with the exception of Race and Star modes in which this item grants only 2 extra points). However, it is the fastest-moving of all the mushrooms, as well as the rarest item in the game!
 Poison Mushroom
Type: Instant
Upon collecting this item, unless you are invincible, you will die. This will have the same effect on your score as hitting spikes or lava.
 Mystery Mushroom
Type: Instant
When you grab this item, everyone on the map will immediately switch positions and stored items with each other. The actual switching is random, so you could swap with Player 2 one time and with Player 3 the next. If whoever takes your place dies within one second of getting there, you will be credited with a kill. Additionally, whoever's place you take, you will also take their stored item in place of yours, even if they didn't have anything (in which case you will then have nothing stored). The effect used when players switch can be changed in the Options menu under Item Settings.
 Fire Flower
Type: Weapon
This item gives you the ability to shoot deadly fireballs with the turbo button. Fireballs bounce along the ground for a while until they disappear, but they will also disappear if they hit a wall or another player.
 Hammer
Type: Weapon
This item will give you the ability to throw hammers. Hammers travel in an arc whose lateral distance is determined by how fast you are moving, and as a result, hammers are not very easy to aim - but they can give you a big advantage over players who are trying to jump you if you can use them well.
 Boomerang
Type: Weapon
This item gives you the ability to shoot boomerangs. Using the default behavior, Boomerangs will travel ahead in a long arc before turning around and going in a straight line until they disappear. However, there are other trajectory types you can choose, under the Options menu (see below), if you don't like the default. Boomerangs, like hammers, can be shot through solid walls.
 Feather
Type: Weapon
When you grab this item, you will don a cape and be granted the ability to jump a second time in midair! The second jump will be weaker than the first, though. This item is great for reaching high ledges, items, and targets. (Note that even though the Feather doesn't allow you to shoot anything, it still counts as a Weapon, so you can't have both a Feather and a Fire Flower, for example.)
 Invincibility Star
Type: Collectable
Gives the player invincibility for 10 seconds. During this time, the player can walk on spikes/lava, stay above the map as long as they want, continually fall without burning up, and kill other players just by touching them.
 Bob-Omb
Type: Collectable
This item turns you into a Bob-Omb. Pressing the turbo button causes you to explode and kill players around you. However, you can only explode once before you return to normal again. If you kill a player who is a Bob-Omb, and you aren't one already (which includes if you were one and just exploded), you will steal their Bob-Omb status.
 Clock
Clock
Type: Stored
When you use this item, all players that are not on your team will be slowed down and will only be able to jump 2 blocks high. These effects last for 10 seconds.
 Bullet Bill
Type: Stored
When this item is used, Bullet Bills of your team color will fire in from the sides of the screen for about 5 seconds. Players on the opposing team must dodge or jump on the Bullet Bills to avoid death. Additionally, If two players' Bullet Bills collide, they will explode. This explosion will kill anyone it touches, including the owners of the Bullet Bills.
 POW Block
Type: Stored
When this item is used, the screen shakes for about half a second and any players that touch the ground during this time are killed. You should watch for when an opponent uses one of these, and make sure you make a big jump so you don't die.
 MOd Block
Type: Stored
This item acts exactly like the POW block, except that when you use it, instead of killing players on the ground, you kill players in the air. So, when an opponent is using one of these, you should stay on the ground for a bit to avoid getting killed.
 Green Shell
Type: Throwable
When this item is thrown or stomped on, it will start bouncing around the map. It can be jumped a second time to stop it. It will kill the first person it hits while it is moving, and will disappear afterwards. It will also disappear if it stays moving for too long without hitting anyone. You can also kill Green Shells with projectile weapons such as fireballs. Green shells will not disappear by themselves if they are not moving or if someone is carrying them.
 Red Shell
Type: Throwable
This item is exactly like a Green Shell except for one detail: it doesn't stop when it hits one player, and will instead plow through as many things as are in its way until its time runs out or until someone shoots it.
 Spiny Shell
Type: Throwable
This item is exactly like the Red Shell, except that it is covered in spikes and so it can't be jumped on to stop it once it's going. It can still be shot, though.
 Buzzy Shell
Type: Throwable
This item is exactly like the Red Shell, except that it is immune to projectile weapons. It can still be jumped, though.
A couple notes about Shells
When two shells collide, if they are both the same "strength" (i.e. if they are both green or if they are both multikilling shells) then both of them will die. Otherwise, only the green shell will die (the multikilling shell will kill it and keep going). Also, when you win a shell from the Bonus Wheel, it will become a stored item. When you use it, if you are holding the Turbo button, the shell will appear in your hands so you can kick it; otherwise, it will appear in front of you and start moving right away.
Game Options [click to view]
Gameplay [click to view]
Respawn
This option allows you to configure how long it takes your character to respawn after dying. It can be set to any value between 0 (instant) and 10 seconds, in increments of 0.5 seconds.
Shield
This allows you to change the amount of time for which you are invincible right after spawning or warping. It can be set to any value between 0 (none) and 5 seconds, in increments of 0.5 seconds.
Bounds Time
In play, if someone stays above the top edge of the screen for too long, they will be penalized by dying. This option allows you to configure how much time is allowed before being penalized. It can be set between 1 and 10 seconds, in increments of 1 second, or you can disable it altogether by setting it to Infinite.
Warp Locks
This can be set to any value between 1 and 10 seconds, in increments of 1 second, or it can be set to Off. When set to anything other than Off, after one player uses a set of warps, all the warps in that set will be locked for the specified time to prevent other players from using them. When set to Off, warps can be used freely.
Bots
You can choose what difficulty level you want the AI to be here, between Very Easy, Easy, Moderate, Hard, and Very Hard. Very Hard is equivalent to the AI strength from version 1.6 and before.
Frame Limit
Here you can set the FPS as low as 10 and as high as 500 (!) frames per second, with a default speed of 62, or you can even turn the FPS limitation off altogether. If you have problems running the game at the default, or if you want to practice at a slower or faster speed, you should check this option out. Bear in mind that the game uses 62 as the number of frames per second when calculating things like how long shells last, so if you set the FPS to lower than that then things will last longer, and if you set it higher then things won't last as long.
Point Speed
This can be set to Very Slow, Slow, Moderate, Fast, or Very Fast. It controls how fast players accrue or lose points in point-based modes such as Domination or Tag. Moderate is equivalent to the point speed from version 1.6 and before.
Team [click to view]
Kills
When this is on, you can jump on and shoot your own teammates. When it is off, you and your projectiles will go through your teammates. This does not apply to shells or throw blocks, however!
Team Colors
When this is on, all teammates will be set to the same color. (It is recommended that teammates choose different-looking skins, in this case.) When off, player 1 will always be red, Player 2 will be green, and so on.
Item Selection [click to view]
On this screen, there are 20 sliders, each corresponding to one of the different items that can appear from a "?" block, as well as the relative frequency of that one popping out. Each slider can be set from 0 to 10 inclusive, with 0 meaning the item will not appear at all.
As an example, the defaults for 1UP Mushrooms, Poison Mushrooms, POW Blocks, and MOd Blocks are 10, 5, 2, and 2 respectively. That means a 1UP is twice as likely to appear as a Poison Mushroom and 5 times as likely to appear as a POW, by default, and that POWs and MOds appear with equal frequency since they have the same number.
Item Settings [click to view]
Stored Use
This affects how long of a delay there is between pressing the item button and using your stored item. The higher the delay, the more reaction time your opponents have. This can be set to Very Slow (where it takes around two full seconds to use items), Slow, Moderate, Fast, and Very Fast (less than half a second).
Item Spawn
This allows you to set how long it takes for item boxes to generate another item after one gets knocked out of them. It can be set to any value between 5 and 60 seconds, in increments of 5 seconds.
Swap Style
This allows you to change the style of swap used with the Mystery Mushroom. Blink causes the players to blink back and forth. Walk causes them to walk in a straight line to their new destinations. Instant eliminates the delay caused by the other two animations and is the most chaotic of the three options.
Bonus Wheel
This can be set to Tournament Win, Every Game, or Off. When on Tournament Win, the bonus wheel appears after the end of a tournament and grants the winner an item. When on Every Game, the wheel appears after every game instead of just tournament-winning ones. When set to Off, the wheel does not appear.
Bonus Item
When set to Until Next Spin, players will keep items that they won from the bonus wheel until the someone spins the wheel again (i.e. there will only ever be one bonus item in play). When set to Keep Always, players will keep their bonus wheel items until they spin for new ones (so there can be multiple bonus items in play).
Reset Items
If someone has an item from the bonus wheel, this will allow you to get rid of it.
Weapons & Projectiles [click to view]
Fireball Life
This can be set between 1 and 10 seconds, in increments of 1 second. Fireballs will automatically disappear after they have stayed onscreen for this long.
Fireball Limit
This allows you to limit the number of fireballs you can shoot with each flower you get. It can be set to 2, 5, 8, 10, 12, 15, 20, 25, 30, 40, 50, or Unlimited.
Feather Jumps
This can be set between 1 and 5, and it simply determines how many extra midair jumps the Feather grants.
Feather Limit
This allows you to limit the number of midair jumps you can make. It can be set to 2, 5, 8, 10, 12, 15, 20, 25, 30, 40, 50, or Unlimited. Bear in mind that if you do multiple midair jumps in a row (using the Feather Jumps setting above), every single one counts as a separate weapon use.
Boomerang Style
With this, you can switch between Flat, SMB3, and Zelda styles.
Boomerang Life
This can be set between 1 and 10 seconds, in increments of 1 second. Like the Fireball Life setting, boomerangs will automatically disappear after staying onscreen for this long.
Boomerang Limit
This allows you to limit the number of boomerangs you can shoot with each pickup. Like the other Limit options, it can be set to 2, 5, 8, 10, 12, 15, 20, 25, 30, 40, 50, or Unlimited. Unlike other weapons, however, if you don't catch your own boomerangs, you are penalized by an extra shot.
Hammer Life
This can be set between 0.5 and 1.2 seconds, in increments of 0.1 second, or you can set it to No Limit. Like the Fireball Life setting, hammers will automatically disappear after staying onscreen for this long. If you set this to No Limit, then hammers will disappear off the bottom of the screen.
Hammer Delay
Because hammers are so powerful, there is a delay after firing one in which you are not allowed to fire another. Here, you can set this delay to between 0 (none) and 1 second, in increments of 0.1 second.
Hammer Power
When this is set to One Kill, hammers disappear when they hit something. When set to Multiple Kills, hammers will go right through everything they touch!
Hammer Limit
This allows you to limit the number of hammers you can shoot with each item pickup. Like the Fireball limit, it can be set to 2, 5, 8, 10, 12, 15, 20, 25, 30, 40, 50, or Unlimited.
Shell Life
This setting allows you to change how long shells last before they automatically disappear. It can be set to 1, 2, 3, 4, 5, 6, 7, 8, 9, 10, 15, 20, 25, or 30 seconds, or you can set it to Unlimited.
Blue Block Life
Similar to the Shell Life setting, this allows you to change how long Blue Blocks last before they disappear. Unlike the Shell setting, however, this also affects how long you can hold them before they disappear in your hands. The same options as for Shell Life are available.
Graphics [click to view]
Spawn
This allows you to change the way players appear on the map.
Awards
This allows you to change the type of extra eyecandy shown on screen when a player gets three or more consecutive kills.
Scores
This option enables you to change where the scores are displayed onscreen. Top and Bottom place all the scores in those places, and Corners will put one score in each corner of the screen.
Crunch
When this is on, the screen will "crunch" each time someone dies, just as in the original DOS Mario War.
Top Layer
Some maps have layers of tiles which the players can move behind. When this is set to Foreground, the players and all the special blocks on the map will appear behind these tiles. When this is set to Background, the players, blocks, projectiles, etc. will appear in front of these tiles. Setting this to Background can improve performance on slower machines, but will often cause the game to look weird because the players will be walking in front of stuff they shouldn't be.
Crown
When this is On, the crown that appears on the winner's head on the score display will also appear on their head in the actual game, so that they are more easily identifiable. When set to Off, the crown will only appear on the score display.
Screen
This simply allows you to change between Fullscreen and Windowed modes. (This doesn't appear on the Xbox version.)
Screen Settings (Xbox version)
This will take you to a menu where you can change various screen settings. We are NOT responsible if you screw up your TV with these - use at your own risk!!
Menu Gfx and Game Gfx
This allows you to select custom graphics packs if you have any installed on your machine. Graphics packs are installed by unzipping them into the gfx/packs subfolder of the game. (Make sure that when you unzip the files, they stay in their original directories; otherwise the game will not recognize the new packs!)
Sound [click to view]
Sound
This allows you to alter the volume of the game's sound effects.
Music
This allows you to alter the volume of the tunes in the background.
Next Music
When this is set to Off, whichever track the game picks for the map will loop indefinitely. When set to On, the game will switch to a different music track after the current one has ended.
Announcer
This allows you to select an announcer, if you have any installed. Announcers are installed by unzipping them into the sfx/announcer subfolder of the game. (As with graphics packs, make sure the files get unzipped into the proper directories!)
Playlist
This allows you to change the game's music. Music packs are installed by unzipping them into the music subfolder of the game. (As with graphics packs and announcers, make sure the files go in the right places!)
Sfx Pack
This allows you to select custom sound effects packs if you have any installed. They go into the sfx/packs subdirectory of the game. (You should know what this parenthetical note should say by now.)
Refresh Maps
This will refresh all of the map thumbnails stored in the maps/cache subdirectory. Be warned that this can take quite a long time.
Level Editor [click to view]
Starting and Choosing a Map
When the level editor starts, you will be viewing the first level in the map
list.
To change which map you are looking at, press Page Up or Page Down. By switching
the map in this way, you will lose any changes on the map that were you working
on. So, before you switch maps, you should press S to save that map if you want
to keep the changes.
Saving the Map
The name of the map is in the upper right corner of the screen. If you want to save to a different map and not overwrite the current map, hold shift then press S. The "save as" text will come up and you can save it as something else.
Taking Screenshots
Before putting up your maps for download, you might want to take some pictures so people can look at them before they try them out. Press the Insert key on the keyboard and three .png files of different sizes will be saved to the maps/screenshots subdirectory.
Something you might want to know
Make sure you play around with the controls a bit before trying to create an
important map. Just remember that pressing S saves instantly to what ever map
name is in the upper right corner, overwriting whatever was there before.
You can also press F1 in the editor to bring up a help screen, in case
you need it.
As a general rule, if you want to place something, you should click with the left mouse button; to remove things, click the right mouse button.
Controls
- T
- Brings up the tile set - select a tile by left clicking on it, or go to another page of tiles by clicking on the numbers in the lower right. (DON'T RIGHT CLICK ON TILES unless you want to change the type of tile it is; however, changes to tile types will only affect how they act on your machine, NOT the machines you distribute the maps to). Now you're in "Tile Mode". Look to the upper left corner for the mode you're in. Tiles are collision detected blocks that don't move or background non-collision detected images.
- I
- This brings up the interaction block set - select a block by left-clicking on it. Now you're in "Block Mode". For a list of blocks and their descriptions, see the Special Blocks section, above. Blocks can be placed over tiles without replacing the tile. So, for example, if a brick is placed over a tile block and in the game the player destroys the brick, then the tile block will become visible.
- W
- This rings up the warps set - select a warp by left clicking on it. Now you're in "Warp Mode". Warps face outward; this means that if you want a player to be able to warp down into a pipe below him, you should place an upward facing arrow on those blocks. All warps with the same number are considered connected, and players will randomly exit from another warp with the same number that they entered from.
- M
- This puts you into "Move Mode" - you can now select areas on
the map and move them around. First select an area so it is highlighted in
red. Now click and hold on that area and move the mouse to drag it around.
There are some more tools you can use to make this more powerful:
- Shift - This allows you to select multiple areas at once. Hold down the shift key then select areas on the map. All the areas will stay selected.
- Ctrl - This allows you to select areas freehand. Hold down the left control key then select areas on the map. The areas are now selected just under the mouse instead of the drag select box.
- C - This will make a copy the areas currently selected. Move your mouse around to see what it will look like when you paste it back to the map. When you are happy with the placement of the copied areas, left click the mouse to add it to the map. If you want to abort the paste, right click the mouse.
- Delete - If you want to delete certain areas of the map, simply select them and hit the Delete or Backspace key.
- L
- This brings up the Tile Types set - pick one by clicking on it. Now you're in "Tile Type Mode". Left-click to set tiles to the type you picked, or right-click to clear tile-types (players can move freely through a tile if there is no tile-type associated with it).
- P
- This puts you into "Platform Mode" - from here, you can set up
all the moving parts of your map. Here are the things you can do:
- Click the "New" button to create a new platform. When creating a platform, the controls are more or less the same as when editing a map. (Bear in mind that you can create platforms anywhere on the screen. Also bear in mind that you can only put tiles into your platform - interactive blocks are not allowed.)
- If, instead of making a new platform, you'd like to edit an existing one, click on one of the numbered buttons.
- While making a platform, press P to change the path the platform will take. Use the left mouse button to place the starting point (green), and the right mouse button to place the endpoint (red). Note that the game currently only supports platforms that move back and forth, and platforms can only move vertically or horizontally.
- While on the platform-making screen, press + or - to change the speed the current platform will have. The current speed is shown in the upper right corner of the screen.
- Press Delete while working on a platform to delete it altogether.
- X
- This puts you into "No Player Spawn Mode" - you can now select areas of the map that you don't want the players to spawn in, which will appear as yellow boxes with red Xs on them. This is useful if you have a part of your map that would cause problems if players could spawn there, such as places where it is impossible to get jumped on or to jump out of.
- Z
- This puts you into "No Item Spawn Mode" - you can now select places on the map that you don't want mode objects (such as coins, eggs, and bases) to appear. These areas will appear as green boxes with red Xs on them. These should be used to keep important things from appearing in places that players cannot reach.
- V
- Pressing V will hide all the interactive blocks on the map so you can see what's behind them.
- Y
- Since there are 4 layers to a map, you need to be able to select which layer you want to add tiles to. Use the "Y" key to do this. On the upper left, you'll see a little 0,1,2,3 icon. The colored number is the layer you are currently working with. When you add tiles, they will be added to this layer. The layers are ordered, with 0 being the bottom-most layer, and 3 being the top-most. You can use this key in conjuction with the "U" key to view just a single layer.
- U
- Toggles viewing just the selected layer or all the layers at once. Sometimes it is helpful to just be able to modify a single layer without having to look at everything else.
- O
- Optimizes the layers. This essentially moves all solid tiles down to the deepest available layer. There is a performance hit for tiles in layers 2 and 3 of the map. You should try to place as many solid tiles that a player would never be behind in layers 0 and 1. This optimize tool helps you do that. Save your map prior to using this feature because it can split up tiles across layers which makes the map hard to work on after you optimize it. Optimized maps should behave in the game exactly the same way unoptimized maps do, except for the fact that they will not tax your machine as much.
- N
- Creates a new map with the current map's background. You will be prompted to enter a name for the new map.
- S
- As stated above, this key will immediately save the map to the name in the upper right corner of the screen.
- Shift + S
- This allows you to save another copy of the map with a new name. However, the editor will not switch to that copy - if you want to work on the new map, you'll have to go select it yourself (although you can use Shift + F to find it, as explained below).
- Shift + F
- Find a map by name - This will bring up a dialog where you can enter part of a map name and it will open the first map whose filename contains a match for that string (if no map matches, the program will stay on the current map). You can then repeatedly press F to view all the maps that match that string.
- F
- Repeatedly press the F key to view all the maps that match the current find string. If you haven't used "Shift + F" yet, pressing F will bring up the find dialog.
- Page Up/Page Down
- This will immediately go to the previous or next map in the list, respectively. Don't forget to save before using these!
- Left click
- This will simply place a tile in the currently selected layer, or place a block in the block layer. (There is only one layer available for blocks, but it is separate from the other four layers.)
- Right click
- This will remove tiles and blocks from the currently selected layer.
- B
- This will bring up a menu of background thumbnails. Press Page Up or Page Down to view more thumbs. Left-click a background to select it and use its music category as well, or right-click a background to select it without selecting its music category.
- G
- This will change the current map's background image.
- R
- This will change the current map's music category. This affects what songs, out of the current music pack, that the game will decide to play when you use this map.
- E
- This will bring up a dialog which will allow you to select what kind, if any, of extra eyecandy you want on the map.
- CTRL + DELETE
- This will clear all tiles and blocks from the current map.
- ESC
- Exits the level editor.
